
|
WARNING! Backup your data often! BACKUP your log directory at the end of EVERY session! All that you need to backup and store in a safe place is the log database directory located in the ~/.config/cqrlog/database folder, or you can enable the autobackup function in Preferences. This autobackup function creates an ADIF file with a backup of your log. |
| [Menu] |

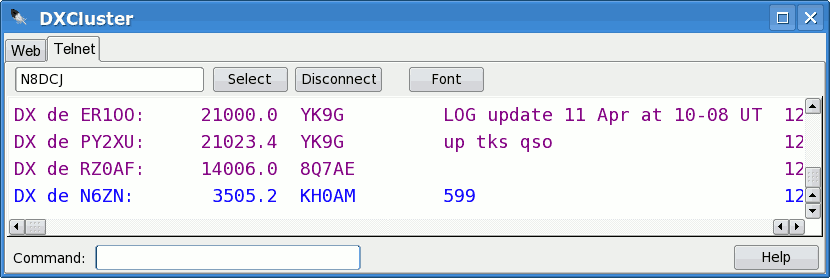

With Ctrl-W you can send a spot to DXCluster if you are connected. If NewQSO is empty the spot is generated from last logged call from current log.
If there is a call entered in NewQSO/Call field NewQSO information will be used for spot generation.
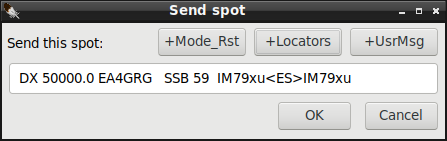
Additionally you can add used Mode and RST sent by pressing button +Mode_Rst and/or add locators by pressing button +Locators
. Locator separators <> will have propagation mode included if it is set from NewQSO/Satellite/Propagation.
+UsrMsg adds user defined message.
User message can be generated with right mouse click to button. Same predefined macros as in cw messages can be used.
Moving mouse cursor over button a hint will show the text what is added by pressing button.
Note! There is a limited space to spot info. User string generation warns you about long message, but it is up to you to decide.
You must cancel spot sending and reopen it with Ctrl-W to get User message up to date after editing it.
Strings can be added only once. To edit or delete added strings you must use keyboard's delete button. When spot looks good press enter or click button OK and spot will be sent to connected DXCluster.
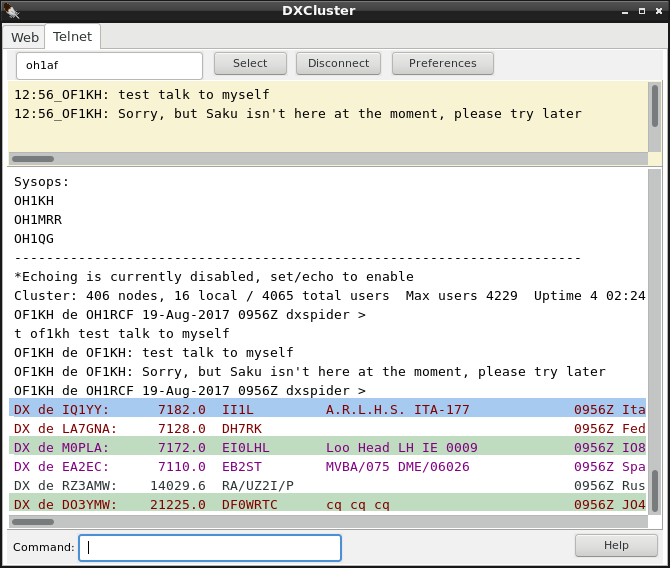
With Ctrl-Z you can scroll back 5 last used DXCluster commands. It is very handy if you make error
in cluster command. You do not have to retype everything, just Ctrl-Z and then fix the command and send it again.
With Ctrl-S you can save the DXCluster command that you have typed, but not yet sent to dxcluster.
Command disappears from "command"-line and is saved as StartConnectionCommand. It will be sent to dxcluster as
first command after connection is established. You can set it for example sh/dx 50 to get your Bandmap
populated right away when connected.
You can type this command to "command"-line and save it with Ctrl-S when you are not connected, but it will be saved also when you are connected to DXCluster (then it is not sent to DXCluster, just saved).
To remove saved StartConnectionCommand just press Ctrl-S when "command"-line is empty.
This command can be set also via Preferences/DXCluster.

Callsign alert is enabled from dialog that opens pressing DXCluster window's "preferences"-button. For setting up the alert itself see
Preferences/DXCluster. From same dialog as setting up alert also the list of alerted callsigns opens.
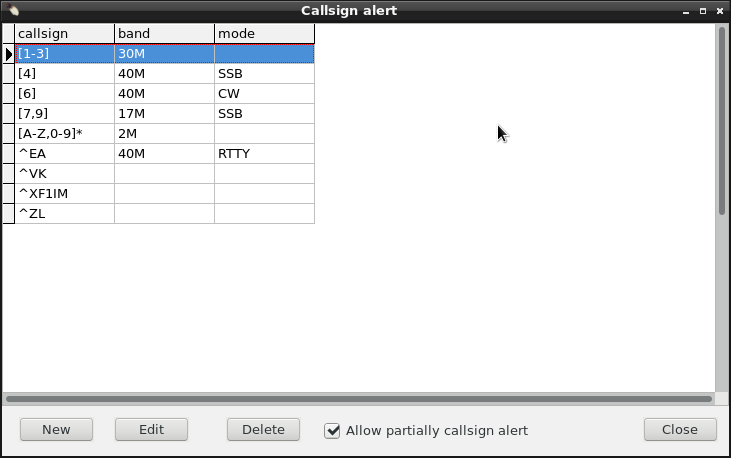
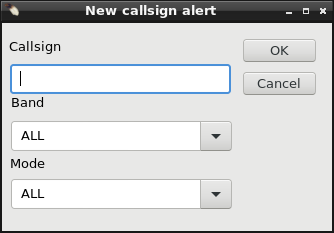
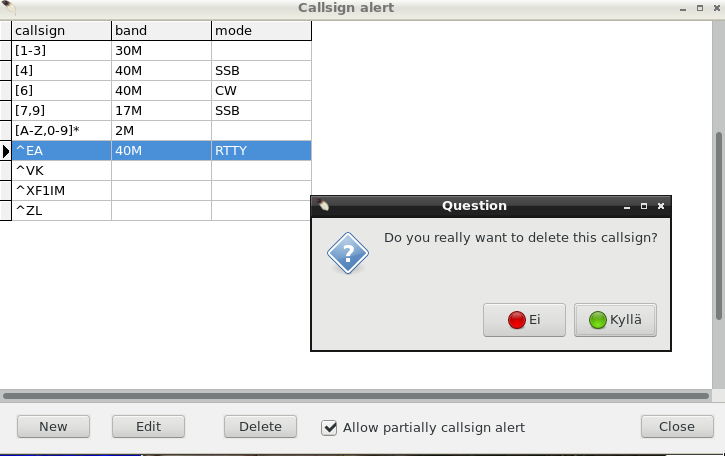
Callsign alert window allows adding, deleting and editing callsigns that should activate the alarm.
Usage is quite straight: just add all new callsigns you want to alert. For more specific alerts set also band and mode that you want to produce the alarm.
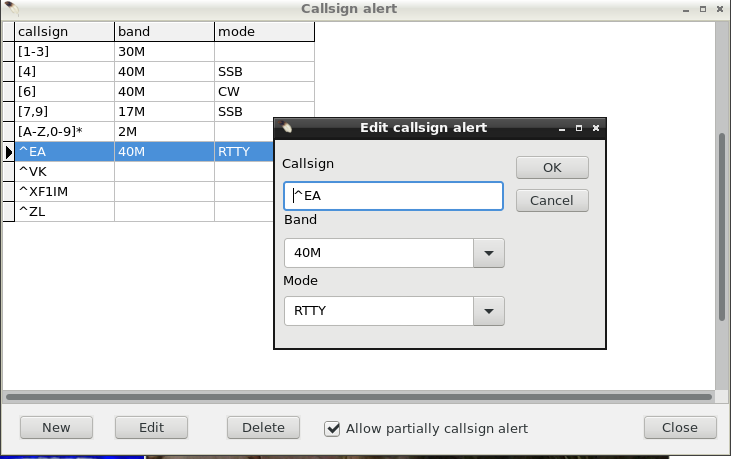
There is also checkbox "Allow partialy callsign alert" that allows many different kind of alerting conditions using regular expressions (regexp).
As an example from the image of callsign alert window you can see different regexp variations for some alert conditions.
In order they will alert as follows:

The size of Chat window, relative to Dx spot window can be adjusted pressing first button “Preferences” and then selecting “Chat size” from there. After doing that “Command:”-cell at bottom of window is replaced with size slider.
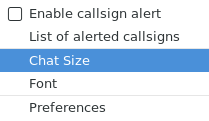
Pressing the slider knob with mouse-left button and moving slider will reduce the size of chat window. When mouse button is released “Command:”-cell returns and Chat window remains selected size.
If you have never used Chat window before default size will be 2 (=invisible).
Resize via “preferences”-button if you want to see it.
If you do not like this Chat window you can move/leave it to minimum size (2). Then it takes just horizontal 2px amount from DXSpot window.
While minimized to up Chat window still receives all lines addressed to your logon call (and not having “>”-prompt at the end of line).
So any time you like you can make it larger and chat lines are there to check.
 |
Our tip: For a nice looking cluster window, choose a fixed-width font. We prefer Monospace Regular or Onuava but also Courier works nicely. Apple's Monaco font is also very nice and has a slashed zero. |
|
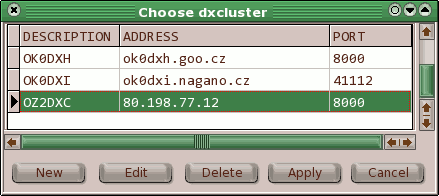
CQRLOG
has some predefined cluster nodes, however you will probably need to
set up a node of your preference. Click the 'Select' button and a list
of cluster node appears (see below). Click the 'New' option. Another dialog
appears (right).
 |
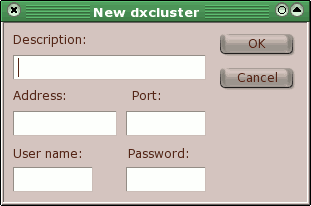 Enter
the description (mostly the callsign). The 'Address' can be either an IP
or the name (see examples in the list). The 'Port' is given by a number.
Both address and port number can be obtained from the lists of DX cluster
nodes which are widely available on the internet.
Remember to put your callsign into the 'User name' field. This will enable autologin. The 'Password' column should remain empty in most cases because only few nodes are password protected. A detailed list of DX Cluster nodes can be found here (page created by Jim, AD1C). |
Bandmap Operation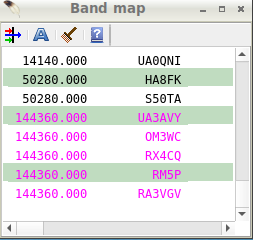   
Quick settings tool buttons from left to right are:
NOTE: When band map window is active no new calls are added to prevent list scrolling. Select another window to be active to let new calls flow to list. See also Quick start - Bandmap |
The main purpose of a bandmap is to combine the most interesting info from two sources - the DX Cluster and your personal notes. The bandmap combines a DX Cluster window with scratch pad memories available on many radios, however a band map is more comfortable by far - you don't need to manipulate subtle buttons on the radio panel, also the transceiver does not indicate what is in the scratch pad memory. The band map is operated from the keyboard and shows all at a glance. A valuable addition is the 'entries aging' option. If the bandmap entry is 'too' old, it changes color and after another period it disappears. This is different from the usual DX Cluster windows which display details of stations you have already worked, that are QRT or are not very interesting to you from another reason. A band map provides frequency-sorted and highly filtered details which don't scroll away (like the DX Cluster window does). There are two levels of filtering:
You can add your own information by writing the call into the logging
screen in the usual way (like logging). Then press Ctrl-A and the entry
will be added to the band map. Your own entries are marked with an asterisk (here MD0CCE).
You can return to the frequency anytime, the call will jump into its box in the same way
as if clicked from the DX Cluster window. Click on any entry, you are on, prepared for
QSO logging.
If the entry becomes older than the set time, it is displayed in a lighter color. Very old entries will disappear, also if you log the station, the corresponding entry disappears from the band map. The entries are always sorted by frequency. When band map form is active new spots are not added. This helps to locate needed line from all spot lines. Form name changes to BM PAUSED! to remind that nothing will be added until focus is moved to any other form by a mouse click. |
Xplanet support |
 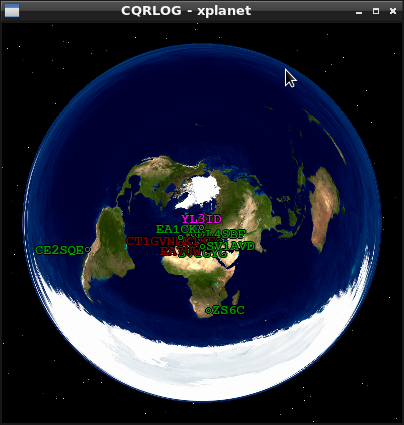
There is currently no other function than DX Cluster spot displaying in true azimuthal projection with correct angles (azimuth) and distances. Alternatively, a map without projection, ie. the globe as seen from space can be selected. With Wsjt-x as source same colors are used as with CQ-monitor and station locations are shown only if locator is known. See also settings in Preferences/xplanet support |
Propagation indicator |
There is a simple window providing propagation indices as provided by the NOAA Space Weather Center. CQRLOG does not include a propagation forecast module but keen users can estimate many parameters just from the supplied data. |
Prop_DK0WCY
|
This propagation form is an alternative showing details from dk0wcy page with 3 hour graphical display of K-index. The Kiel information is lot more exact for use in Europe than Boulder’s. As Boulder information at dk0wcy is one days old, top of form shows time when information is read from dk0wcy web page. ” Indices of”- shows the age of Boulder data. Kiel information is up to date as they are produced by dk0wcy. There is also link to dk0wcy web page. By clicking it page opens to default browser. |
Additional notes to a callsign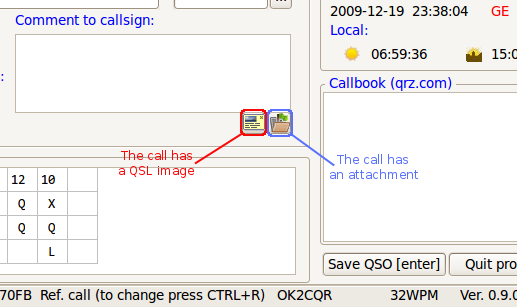
CQRLOG provides virtually unlimited support for additional notes which can be attached to a particular callsign (ie. an electronic QSL, a map showing the position, text files with antenna details etc). Assuming that external viewers for the text, PDF, image (jpg, png, gif) and HTML files are set up properly, all these files can be displayed. The main program tree contains the call_data subfolder where any callsign can have its own subfolder containing the files related to the call sign. The subfolder for a call sign must be created manually. If this subfolder exists, a special icon "Call has an attachment" appears at the bottom right corner of the Comment to callsign field in the main logging screen. Click this icon and another window Call attachment appears, showing the contents of the call sign subfolder. Highlight the file you want to view and either double click or use the View button to display the file. The number of call sign related subfolders in call_data is unlimited, also the call sign related subfolder may contain any number of files. |
 If the folder contains a file named "qsl_call_front.png" or
"qsl_call_front.jpg" (must be .png or .jpg), another icon "Call has a QSL image"
(ie. the ok2cqr subfolder contains qsl_ok2cqr_front.jpg). Click this icon and a QSL browser
appears showing the front of the QSL card. The "qsl_call_front.png" or "qsl_call_front.jpg"
is mandatory but there can also be a reverse side of QSL card with the
name "qsl_call_back.png" or "qsl_call_back.jpg". If this file is available, you can use
the "Front" and "Back" tabs to display both sides of the QSL card.
 |
| [Menu] |
